Showing posts with label heroics and ros. Show all posts

Monday, August 28, 2023

Finnish War 1808: Battle of Ruona 1.9.1808, Battlefield visit and refight

Next up on our series of Finnish War 1808 games is the Battle of Ruona. The summer attack of the Swedish army has lost its steam and now the Russians are advancing again. At Ruona, the Swedish army of 6400 faced a Russian force of approximately 9000 troops. I'm sure you can find better accounts of the battle elsewhere, but in a nutshell: The Swedish army had a good defensive position overlooking a bridge between Kuortane and Ruona. They had also built some defensive works along the line north of that position. The Russians attempted to outflank the Swedish army from the north but were repulsed. Parts of the Swedish army counterattacked and some fierce fighting took place at the Heroja farm. Night fell and both armies retreated from the field. The Russians pursued the Swedish army and fought another battle close by in Salmi the next day. After this battle the war started to seem lost for the kingdom of Sweden and the army began to lose heart.


For this game we went to the location of the battle itself. I visited there a year ago to explore the place myself and decided lure some friends to play a game there this year. The field at Ruona is remarkably well preserved and most of the surroundings are pretty much the way they were 200 years ago. For our game we rented a local closed down school building which also housed a museum room dedicated to the battle. There we could set up our table, have some barbeque and beer and warm up the sauna for post-game discussions of military wisdom.

First we went to tour the battlefield with maps in hand. I'll include some of the pictures here for you, as well as some drone photos I took last year. I had problems with my cell phone so I couldn't fly my drone this year but the aerial photos are fresh enough.

The Ruona bridge and Swedish gun positions


Takala farm and surrounding fields


The position of the Savolax Brigade on the northern flank


Heroja farm and the Russian side of the field


Walking the battlefield we made many observations on how the terrain had influenced the decisions made on the day. The Swedish army, for example, must have been stretched very, very thin because the line was about 3 kilometers long and was held with only 6000 men. The visibility over the fields was good and it was unlikely that any great manoeuvers could go unnoticed. The area around Ruona bridge was very marshy and crossing the 600 meter wooden bridge under artillery fire and musketry would have been suicide for either army.

The game

After the battlefield tour and a break, we played the game itself. I'll let the picture commentary do the talking, but the big picture was that the Russians attempted to break through the northern flank of the Swedish army with a much larger force than they did historically. For a moment it looked like they would indeed break the Savonians guarding the road to Salmi, but the attack faltered to musket and grapeshot. In General de Brigade (the rules we use) units suffering losses get pinned down pretty easily and have a hard time getting moving again, and this worked against the attackers. The Russians managed to turn the Savonian line on the northernmost end, but the day came to a close and the road to Salmi remained in Savonian hands, so we judged the Russians having failed. Whilst the main battle was underway in the north, the men of the Åbo regiment attempted to move on Heroja farm to cut off the attackers from the main army, but having ample reserves, the Russians could easily reinforce that section and the Åbo men called off the attack, turning north instead. The Russians withdrew to their side of the field and the battle ended.


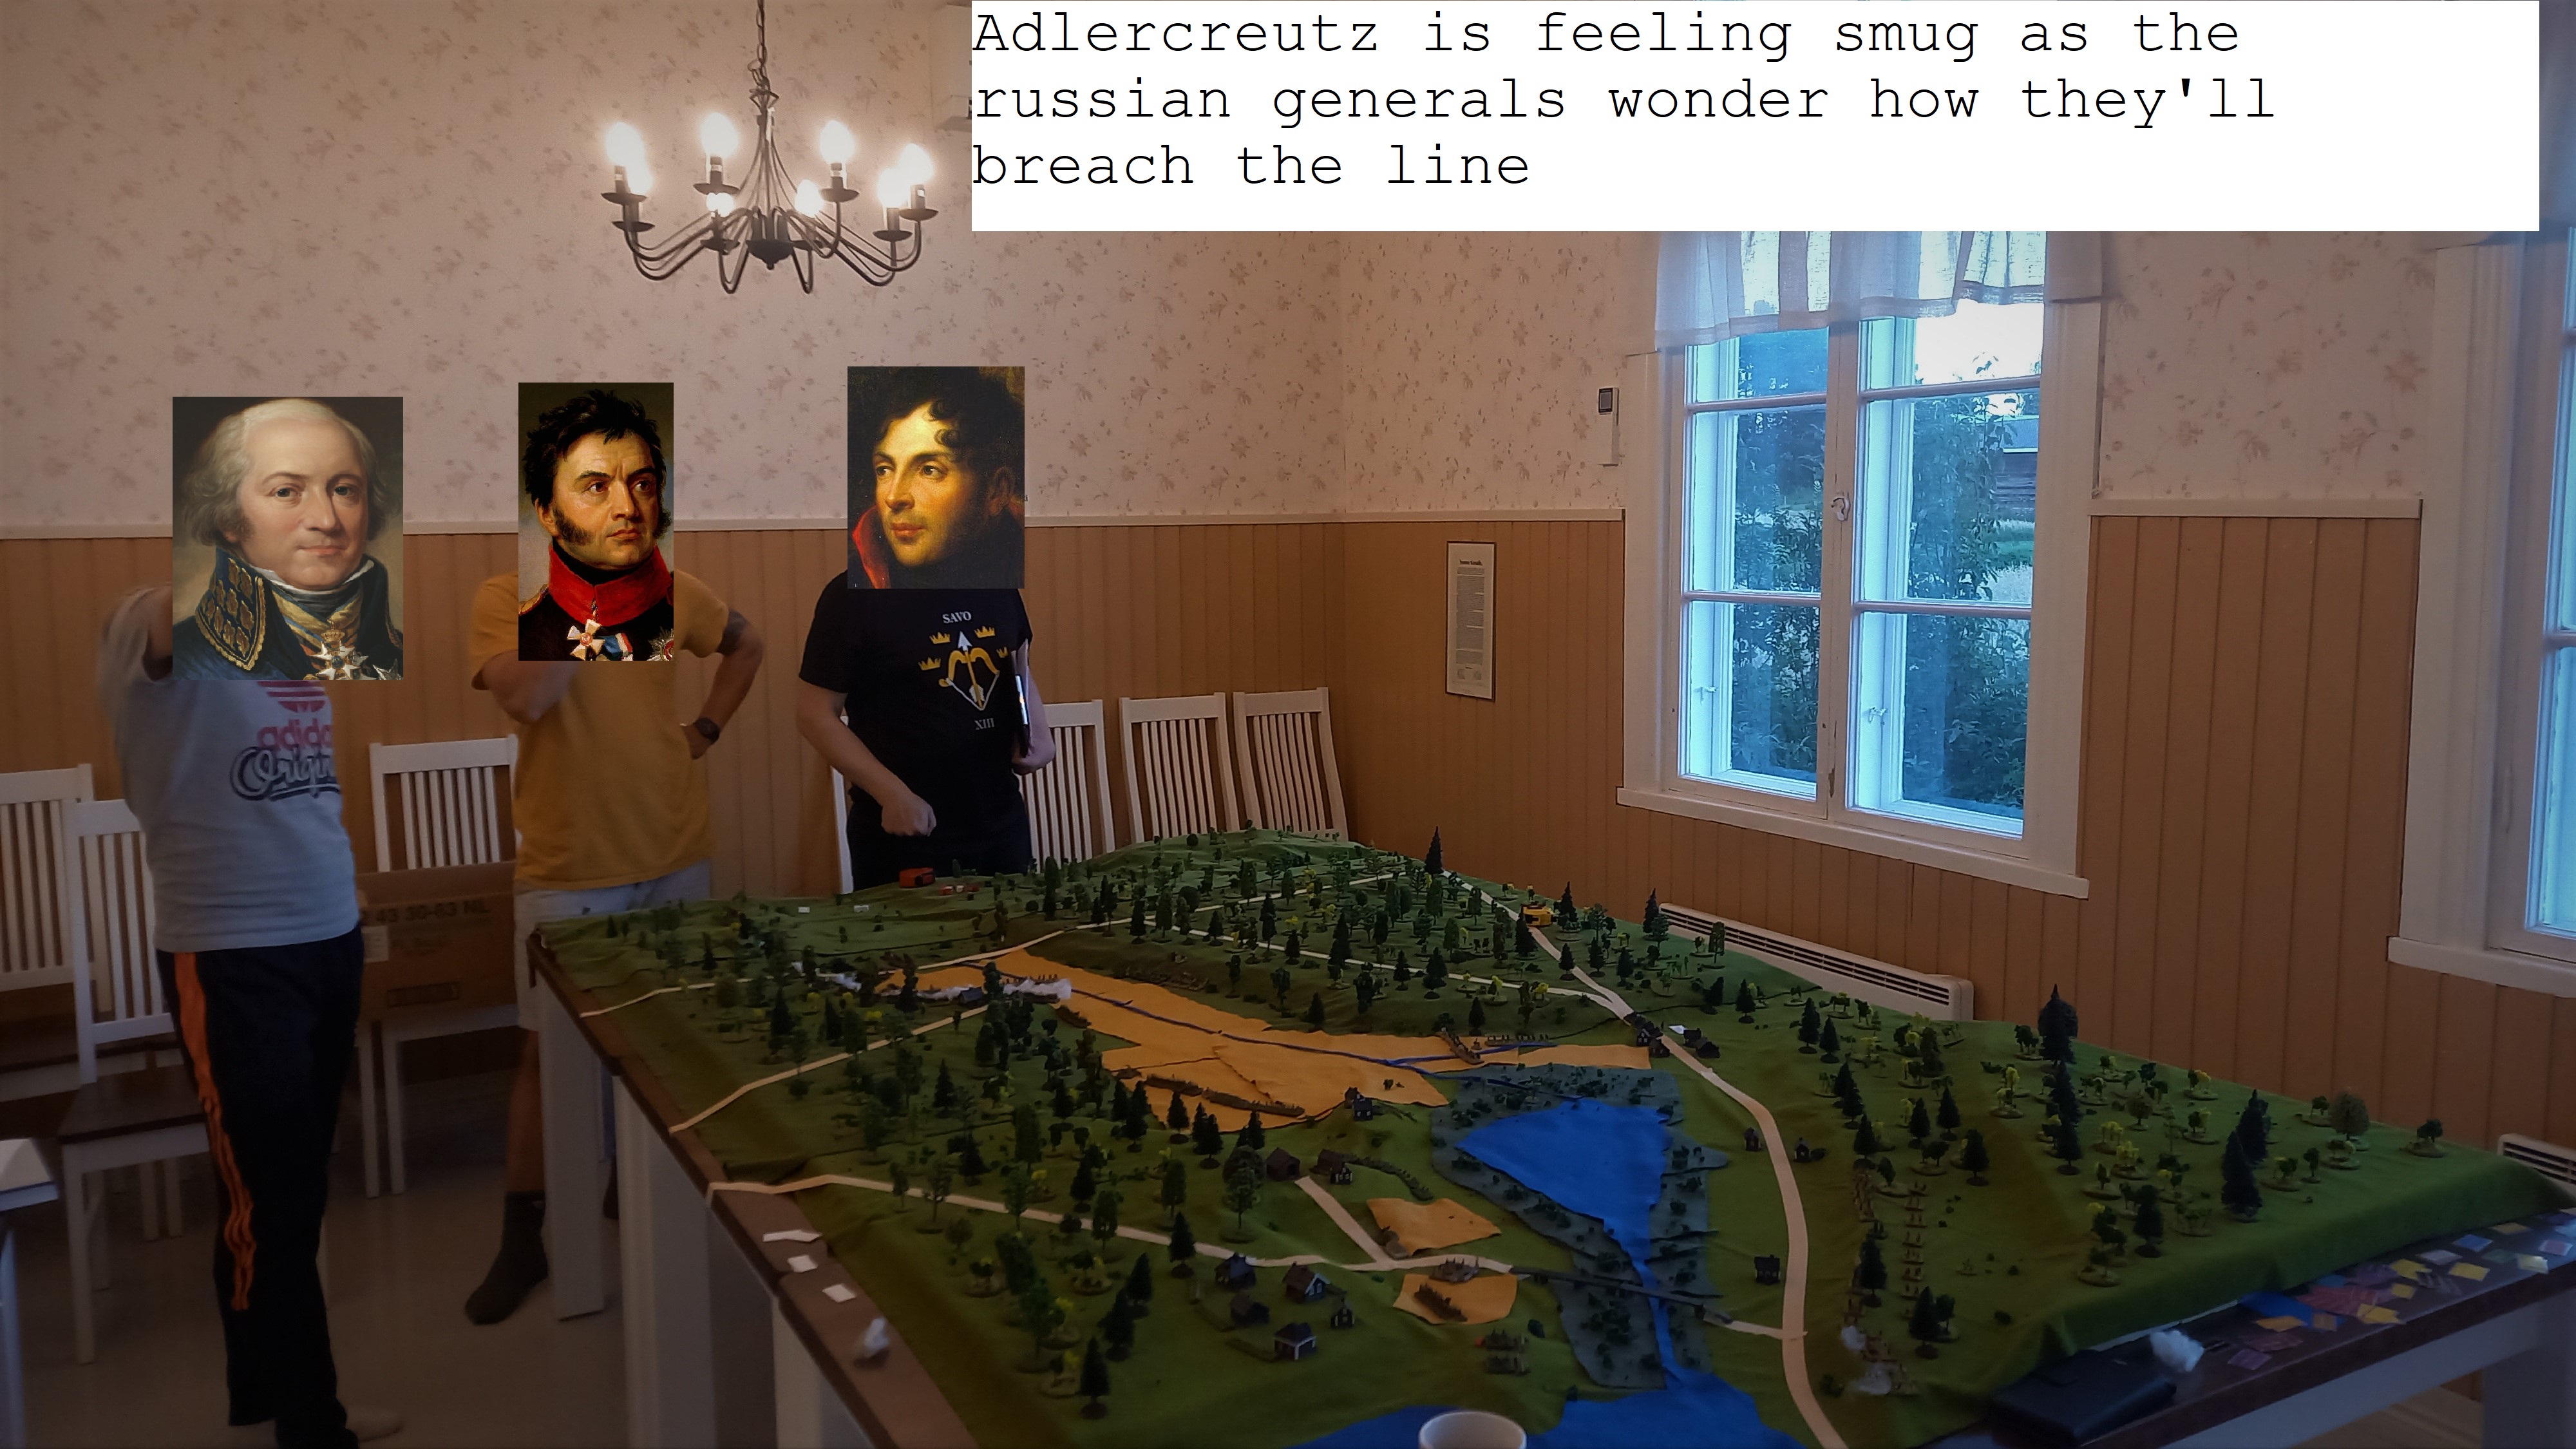


In our games, we estimate that about a third of the losses in the miniature game represent actual dead and wounded men. In this game, the Russians lost 486 men, with Yankovich wounded. The Swedish army lost 136 men, four guns were destroyed and Cedergren wounded. With these numbers, the day had been less bloody than historically, but the end result would be the same. The Swedish position on the extended line would be untenable so they'd have to retreat to Salmi as they did historically. The Russians would no doubt remain on the field as they would be under no illusion of a Swedish counterattack.

All in all, the day was a great success and the battlefield visit enriched the game greatly. Now our campaign will move on to the Autumn of 1808 and towards the melancholy end of the war.


Game details:

Figures by Heroics and Ros 6mm

Rules: General de Brigade by David Brown

Scenario combined from GemiGaBok and Sword and Saber publishing's Finnish war scenarios.

Friday, March 5, 2021

6mm German reinforcements

And here comes the German infantry. Now there's a nice core of infantry for both armies and I think I can pull off more scenarios.

 The grand total for both armies starts to look pretty nice!


Friday, February 12, 2021

6mm Soviet WW2 reinforcements

More infantry into the fray! Once I complete a similar set to the Germans too, I should have enough for a decent Microarmor engagement. Infantry figures are Heroics and Ros based on 30mm squares.


All my soviets at the moment


Friday, October 11, 2019

6mm WW2 Soviet Infantry for Spearhead

I couldn't find my camera so I these were taken with my cell phone. Just some 6mm WW2 soviet infantry as a palate cleanser after all that 28mm I've been doing lately.


Here's everything I have for spearhead so far. I'm starting to have enough for a nice scenario but I still have quite a bit to finish before having proper Spearhead-sized OOB's


Wednesday, April 3, 2019

Spearhead test battle with a kriegspiel twist

I built enough forces to play the introductory scenario "Attack This" from the Spearhead rulebook. It's a small one with just a battalion worth of troops per side and a 30" table representing a three kilometer square of actual terrain. I decided to play it solitaire to teach myself the rules. I've played the cold war variant a few times, but I have to admit that my opponent has handled most of the rules.

A simple solitaire game would have been a bit dull, so I invited a couple of voluteer generals from a wargaming Facebook group I hang out in to form the battle plan for their respective sides and do all the tough decisions during the battle without seeing all the action. With limited knowledge of the battleground and the mechanics, I hoped to create a kriegspiel-like experience.

I sent them both a quick brief of the situation and some technical notes on the rules which would affect their deployment. Here's the material (translated from Finnish)

Scenario map I enclosed in both briefings (North to the top)

"aerial reconnaissance" photo I enclosed in both briefings


German briefing: 
Leningrad front, May 1942
---------------------------------
The winter has been relatively quiet once the siege of Leningrad began in 1941. Come May, things have become more lively however, and the Soviets are on the move. The first battalion of the 124th infantry regiment has been assigned on a three kilometer stretch on the front. Intel suggests the Soviets are massing armored units in this area so an attack on your sector seems likely. Division has sent additional AT guns to you, but no armored support is available. The Soviets must not be allowed to break through!

Troops available:
----------------------------
124th infantry regiment, first battalion.
The battalion consists of the HQ, three infantry companies, a machine gun company, a mortar platoon and a reinforced AT company. Offboard artillery is available.


The German player enclosed this very cool battle plan (It's only in Finnish, sorry!) link to pdf


Soviet briefing: 
Leningrad front, May 1942
---------------------------------
The Soviet Union has achieved the impossible and stopped the fascist warmachine at the brink of ruin. The grand German offensive lost momentum late in 1941 and now it is our turn to show them that socialists know how to blitzkrieg as well! The main attack is planned in Kharkov to retake the city from the Nazis, but besieged Leningrad is also in need of relief. The 92nd armored brigade is to punch a hole in the German line and cause enough casualties for the Germans so that the breakthrough can be exploited. 

Troops available:
---------------------------
32. Tank Corps, 92. Tank Brigade
The Tank Brigade consists of the brigade HQ and two armored battalions.


The Soviet player enclosed this plan:


"The red line marks the route of the brigade HQ.
The first armored battalion reinforced with the recon platoon advances on the eastern side of the line so that the KV-1 platoon with the T-34's operate closest to the HQ along the line Hill 301 and the field -> The forest east of Hill 302 -> the Pass between Hills 303 and 304. The two T-26's of the battalion and the other T-34 platoon will circle around the wood with the field (to distract and draw fire).
The second armored battalion reinforced with the engineers will advance directly via hills 301, 302 and 303 and aim for a quick breakthrough attack. If necessary, any fascists hiding in the woods next to hill 302 will be driven out by the engineers and the tanks of the 2nd armored battalion."

The battle:

Now I had what I needed to run the game without "playing against myself". The only adjustment I needed to make was shift the position of both players' HQ units so that their entire OOB was in command range. The German HQ was moved from the forest to hill 304 and the Soviet HQ had to start moving a bit more to the east from the initial plan.


Throughout the game I would give the commanders updates on their situation. I gave them good information on things happening in the vicinity of their HQ, but was vague on things happening further out. This is a small scenario so there wasn't much for them to do mid-battle (I handled all movement and combat for the forces according to the plan) but they did do small adjustments to the plan based on how they perceived the events.


Turn 1 (south at the top of image): The Soviets advance according to plan, but no visual contact is yet made with the enemy. The Germans spot the Soviet armor (armor moving in the open is seen 18" out while infantry in woods only to 3")

Turn 2: The soviet "feint" to the east comes under fire by Pak35's. They fail to damage the tanks,but a German infantry company reaches the soviet T-26's with their panzerfausts with predictable results. The Soviet recon platoon spots the German company in the.. lets call it "Half acre wood" and the tanks close in to fire at them.

Turn 3: The Soviets on the eastern flank suffer losses and retreat towards the main group. A firefight breaks out at the half acre wood, but with no results. At this point, the Soviet player decides to commit forces from this breakthrough force to flank the half acre wood. One of the T-34's destroy a Pak35 platoon at hill 303.
Turn 4:  The engineers and tanks roll into the half acre wood, making good progress. Those flamethrowers the engineers have sure come in handy when fighting in cover! The German infantry company moves from the woods in the east towards Hill 305 according to the pre made plan, but come under fire by the tanks, also retreating.

Turn 5: The battle for the half acre wood looks bad for the Germans, but they are also causing casualties to the Soviet tanks. The Germans consolidate their position along hills 304-305.
Turn 6 (end): The German forces hang on in the half acre wood, and the Soviets have an unobstructed path to go for the breakthrough, but their morale fails them. Soviets roll their grade during the battle and they came out Green. That means that they roll whether they retreat at 33% casualties, and failed that roll.


The communication between me and the generals was nice and atmospheric during the game, but I cannot be arsed to translate it (If anyone actually reads this far, give me a shout. I think few people read battle reports but rather just skim the pictures). I think with a bigger game there's lots of potential for some double blind action but I need to paint a big bunch of figures for that. As for this game, it was surprisingly entertaining with just the single battalion per side. Sort of a microarmor skirmish game!