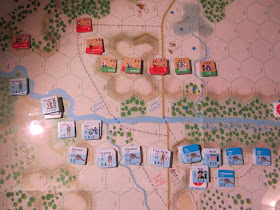
Me and Simo played a game of
Brandywine during two sessions recently. It is one of GMT's American Revolution series games, and I'm quite fond of the series rules. This was perhaps the fourth game of the series I've played and quite interesting as a scenario.
The
Battle of Brandywine was fought on September 11, 1777 during the American war of independence. I won't go into detail here as you, dear reader, can read Wikipedia same as me. Suffice to say the British and American forces are roughly equal in size, but not quality. The British have better troop quality and some badass Hessian mercenaries and such, whereas the Americans have the benefit of defence behind the Brandywine creek. That is, until the massive British flank attack hits. In the scenario, the Americans must prevent the british from getting to the road to Philadelphia along with trying to survive against the redcoats as an army.
The game started with a sizeable force of British and German troops marching on Maxwell's detachment positioned across the Brandywine creek on the American left. After the initial cannonade caused a juicy casualty reduction on a British elite unit, the Americans attempted an orderly retreat to friendly lines, but failed. Only scraps of the detachment made it back.
 |
| The remnants of Maxwell's detachment try to reach friendly lines across the creek. |
In the AmRev series, both armies have an army morale rating which increases with positive outcomes and decreases with adversity. Even small skirmishes may end eating away army morale. Once morale deteriorates from "Good" to "Fatigued", the entire army suffers a -1 penalty to both initiative and individual morale ratings. After it deteriorates again from "Fatigued" to "Wavering" the penalty becomes -2 and the end is near. After a bit more deterioration the army routs automatically and the game is lost regardless of specific victory conditions.
In our case, the American morale started to deteriorate with Maxwell's detachment. In the American center, the British advanced on the creek with forces roughly equal to those on the other side. Brazenly they advanced over the creek.
 |
| Grant's troops cross the creek in the American center. |
The Americans mounted an immediate counterattack against Grant and managed to drive one of his units back to the other side. All went well until the rotund Grant decided to start performing well with his troops, fought off the American attempt to flank him, cut off lord Stirling and his men and captured them. This pushed the American morale well into the "Fatigued" zone while the British morale couldn't go any higher. The Americans tried to reverse their fortune by crossing the creek and assaulting the three British batteries they thought were vulnerable. They failed spectacularly, only managing to disorder one of the batteries. This sends the Americans dangerously close to "Wavering".
 |
| Lord Stirling attempts to flank Grant and drive him back across the creek with an attack from two directions... |
 |
| ...but ends up being cut off from his line of retreat and is captured by the redcoats. Small American units cross the creek in an attempt to capture the exposed British batteries and are shot to pieces. |
Meanwhile on the left, the remnants of Maxwell's detachment have either crossed the creek, been shot to pieces or captured. Washington directed quite a bit of his reinforcements to this section, fearing the British would cross the creek. The British chose however, not to use their momentum and merely observed as the Americans towed a long line of guns into position.
 |
| The Americans bolster the line on the left believing the British and the Germans aim to cross. |
The reason for the British inactivity soon became all too clear for poor Washington. The redcoats had sent half of their forces on a long flanking march to the American right! American dragoons posted as scouts raced to warn the army, Hessians hot on their heels. A portion of the Americans was quickly sent on a countermarch. They couldn't hope to stop the British but they could at least delay them.
 |
| On the right, American scouts report a flanking march with the Hessian elite hot on their heels! |
The battle, however, would be decided on the center before the British flankers would have a chance to fire their muskets. Demoralized by the capture of Lord Stirling, the American center could hardly put up a fight. Even by concentrating attacks on singular British units with everything they had, the superiority in numbers was countered by the poor state of American morale. The level shifted between "Fatigued" and "Wavering" several times before making the final plunge when the British captured the American center batteries without suffering any casualties.
 |
| The British circumvent the American strongpoint in the center and capture two batteries of guns without casualties. |
 |
| The British flank attack arrives! The Americans start building a line of defence to delay them, but army morale is crumbling. |
 |
| The American center collapses. The British forces not much bigger than their own, but army morale has deteriorated to "wavering" and it makes all the difference. Victory is decided here as the Americans are routed. |
The British, after taking some casualties from the massed American artillery on the left, decided to retreat outside cannon range, as there really was no need to risk a crossing anymore. The American morale was broken at the center and the army was routed.
 |
| The jeering British retreat outside cannon range. They do not need to assault the American position as the collapse of the center forces the rebel army to retreat. |
 |
| The final positions. |
Another exciting game of AmRev done! I really like the army morale system in this series. Once army morale starts to drop, it creates a domino effect. The troops fight worse and it is more difficult to get positive results to get morale back to good. Also, the player who has the upper hand often gains momentum chits which he can use to re-roll bad dice and more importantly, force his opponent to re-roll those excellent rolls which might have saved the day. This really recreates the feeling of the uphill struggle the losing general has when he tried to turn the tide of the battle. It also means that battles are not fought to the last man, but rather to the point when the fight is decided on one portion of the field. I think we still have a lot to learn on how to manage army morale as most of our games have ended quite quickly.
In our Germantown game, for example, the British won by attacking vulnerable militia units as they are easy to beat but cause the same morale hits as proper troops.
I think AmRev is one of GMT's best systems, combining very simple series rules (only 8 pages or so) with lots and lots of tactical complexity. They should definitely apply this ruleset to other wars as I'm not terribly interested in the American Revolution as such.


